Saturday, August 15, 2015

Li'l Red Truck

Hello All.  This is another one I started last year; a small truck I painted red.  Ignore the little blue car for right now.  I'm still working on that one.  Anyway, I decided I was going to go fairly straightforward with this little truck.

 
 I started by adding a metallic red finish, then used a copper metallic paint to outline the windows, doors, hood and back end.  I painted silver metallic bumpers and door handles.  The wheels are gloss black with silver metallic hubcaps. 

 
I painted on a front radiator cover and instead of the google eyes, I put on faux crystal buttons for the head lights. 

 
And red ones for the tail lights in the back.

 
Pretty simple.  But I like it.  Here it is all put together and finished.  The back first.
 
 
And here's the front with a couple of windshield wipers in black.  All ready for a Christmas load down route 66.

Thursday, August 13, 2015

Purple & Yellow Cars

These are some cars I actually started working on last year.  They look like VW Beetles. 


They just needed some touch up.  I painted the tires with the black gloss on two of them and left the last one with flat black tires.  I added the little google eyes to two of them as headlights.  On one of the yellow ones I had tried using some fabric - I don't remember what you call it, but it has a shiny plastic look to it.  Anyway, I just couldn't get the lines straight.  And it ended up looking blah.
 
 
I got the idea to put a 66 on the top, but it still looked blah to me.  I also had another yellow car that I had outlined in blue and did the dot and dash thing. 
 
 
I ended up putting the google eyes on the windshield and felt like it really gave it a whole new character.  I outlined little 66 in black to give it more definition and here are the three little cars all together.  Ready for their Christmas on Route 66.  Or is it 99.  66.  It's 66.


Next, the little red truck.  That one turned out nice!
 
Remember to wash your brushes!


Wednesday, August 12, 2015

The Inspiration for Christmas on Route 66


Here is my friend Michelle, who loves to piece quilts.  She's the one who came up with the idea of a car theme because of this quilt she was working on.  Look at the themes!


The hotel and motel ideas along the way as well as road signs across the country.


This is simply a delightful throwback to the fabrics of the 50s.  I'm of an age that it brings up memories.


And what's a car theme without license plates.  Following are the major blocks pieced together.


Michelle is still waiting for some additional fabric before she has the top completed.  We are both coming along.

Saturday, July 25, 2015

The Blue Racer

So far, this is my favorite, though I still have lots of cars to paint.  Nevertheless, I really like how this turned out.  Once again, I forgot to take a true before picture.  But this was one I had started painting last year. I just hadn't started any detail work.


See the little role of tape.  I bought that last year.  I thought to run a stripe or two up the top of the car.  Once it was on, I thought that worked out just terrific.  Next I added my infamous dots.  These, though, were bigger than normal. 


We already know how to put the wheels on.  Looking pretty good, I'm thinking.


But putting the goofy eyes on just didn't seem to be the right thing to do, so I went to JoAnn's Fabrics, where they have a whole wall full of stickers.  I found some stick on round sparkly buttons in clear and red.  Head lights and tail lights!  I did not rely on the pre-adhesive, so used my favorite tacky glue to make sure they stayed on.


And of course, since it's a racer, it has to have a number.  What better than 66 for Christmas on Route 66.  And here's the final.  I'm rather pleased.


Next time, the progress of the quilt Michelle is making!

Friday, July 17, 2015

Little Orange Car

Last time I left off showing a picture of the little orange car.  Remember this?


It was painted with tangerine color and orange pearl craft acrylic paint.  I used metallic ruby and gold paints to make some flames on the top, the hood and the trunk - or whatever they are called in whatever country.  The it was time to put on the wheels.  I went into the kitchen for this.  I have very durable cabinet tops.  The dowels are a tight fit to the "tires."  Using a mallet, I pounded the tires to one end of the dowels.   

 
The washers help the tires spin smoothly. 


And there we are.  All put together.


 I painted the inside of the wheels silver to simulate hubcaps and added small dots of black for the lug-nuts.


Once again, I added the little eyes for the headlights.  And there we are.  All done with Little Orange Car.

 
Next time.  We'll finish up the Yellow and Purple cars. 
 
By the way, I'm all registered for this years Festival of Trees.  So I'm committed now!

Wednesday, June 24, 2015

Christmas Is Coming!!!!

     Yes, that's right.  Christmas is 6 months away, which means that the 2015 Festival of Trees for Primary Children's Hospital is only 5 months away.

     This isn't exactly a make-over, but I'm excited about this project and want to share it anyway.  This is my cute father!   That other person is me.
     For the last 4-5 years, he has been cutting out little wooden cars for the Humanitarian Aid program in South Eastern Idaho.  He's done over 4,000 so far.
     Over a year ago, I asked him for some cars to paint to possibly use for the Festival of Trees, and he gave me this whole big box.


      I looked at the box and wondered how I was going to do this.  What kind of tree would I have?  I started painting some of them, but just really had no direction. 

     Last year, my friend Michelle and I went to the 2014 Festival of Trees and she got an idea.  We had been looking at quilts and door wreaths.  She suggested we do something together again.  She would make a small quilt and I could do a wreath.  We were originally inspired by Christmas Nutcrackers, but some time later, she called me with something different.  She had all this fabric she had purchased that had car themes.  Could we do something based on that?  And I thought of that box in my office.
    
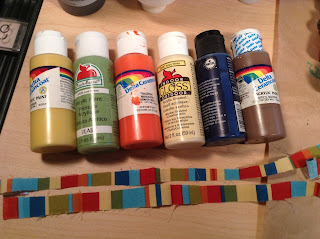
     Christmas on Route 66 was born!  She gave me some cloth that would give me the color scheme.


      I had a wreath that I used to use outdoors, but I took it and washed it down really well.  It's pretty big, but will fit on a 36 inch door and it's in perfect condition.


      I took out the cars I had started working on last year and went to work on them again.


     I put those funny little "eyes" on the purple car as headlights to see if I liked it, and I do.  Most cars are a shiny metallic.  At the time I only had pearlized paints, but I went out and bought a whole bunch of metallic paint.  Originally, I had painted the tires a flat black, but you know how the car wash guys wipe down your tires with this stuff that makes them shiny?  I can do that!  So I'm repainting all the tires with a black gloss paint.


     Now that I have a goal, this is going to be a fun project.  I'm looking forward to seeing how this all progresses. 
 
     Ah, yes.  Here is my friend Michelle, the quilter!  I told her she needs to take pictures when she is putting the quilt together so I can include them here.  I think I need to remind her.
 
     Remember to clean your brushes!

Thursday, June 18, 2015

Let's Get This Done!

Hi Everyone. I've been a bit slow about posting blogs and getting these bunnies done. 
So let's finish this. 
 
 
I've got the basic colors mapped out.  That actually takes longer than it looks because you have to be a lot more careful with your edges, especially on the first coat.  The second and third coats (if necessary) take less time.


Ears for bunnies and cats, are actually quite fuzzy, with lots of long hairs poking out.  To replicate this effect, I used a fan brush and got it quite dry, then stroked it over the ears. It sorta worked.
 
 
I want the base to be a vibrant green, so I tested some colors to see what I liked. 
Going with the bright green there.
 
 
As you can see, I've added the stripes back in to the shirt and covered the red dress with a pink pearlized acrylic paint.  Looks shimmery.  On the eyes, I used black gloss paint, rimmed them in white, just like the bunny from my last blog, then added a dot of blue gloss to the black.  When that was dry, I added a tiny white dot to look like a reflection.
Now comes the detail on the dress. 


 I used pearlized acrylic paint in purples, greens, and yellows.  A very spring time dress, I think.  Much better than the original sack.  In fact, it's still a sack of a dress, but now,
its a sack with flowers all over it.  :)
 
My boy bunny got dots on his kerchief,...


 ...dashes on his britches and I just couldn't resist that big flower on his knees and big belly.


More dots and dashes to add pockets and seams.  These little details "make" any makeover. 
This kind of detail is just not done much on mass produced items that need to be done quickly.
 
 
For her flower, I used yellow on the outside and tangerine orange on the inside to make a two color tulip.  The leaves were painted a solid color of green, then I took a darker green, added water to it to make a wash and carefully dripped it into the lines.
 
 
The base was made up of three colors of green.  First the medium, then a darker, then a brushing of yellow-green.  Finally, I'm ready to finish.  I chose to use an acrylic varnish.  There's no smell to these and they do make a nice shiny finish, but you have to be careful, because they bubble easily.  Be sure to paint out the bubbles.  I did 2 coats of the varnish.
 
And here they are all finished! 


Don't forget to sign your work!
 
And here's the difference. 
Before.
After
 
I don't know that they look better, but I do think they have more character
and are all ready for Easter.
 
Finally, I can get on to some other projects.